
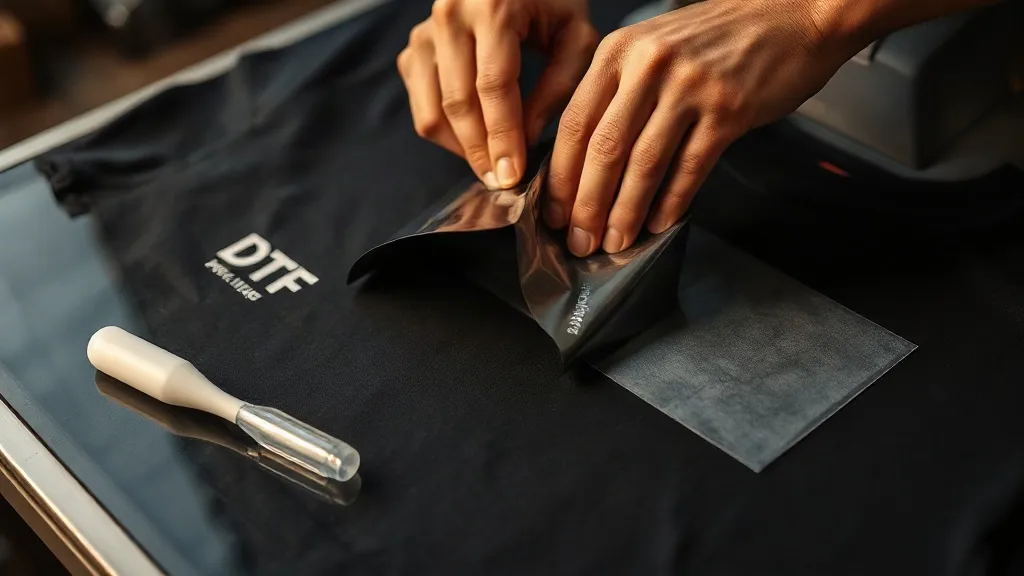
The moment of truth in any DTF transfer application isn't the press closing or the powder shaking. It's the peel. That single motion, whether done hot or cold, can lift a print from amateur to professional or leave it looking like a wrinkled mess. If you've ever stared at a transfer wondering why half the design stuck to the film instead of the shirt, you're not alone. The peel is a skill, and like any skill, it rewards those who understand the why behind the how.
In this guide, we're diving deep into the peel phase of dtf transfers. We'll cover the chemistry behind hot and cold peels, how to choose the right method for your fabric, the tools that make it easier, and the troubleshooting steps for when things go wrong. By the end, you'll have a repeatable process that works across different garments and designs.
Why the Peel Deserves Your Attention
DTF transfers rely on a thermoplastic adhesive that bonds to fabric under heat and pressure. The film you peel away is a carrier sheet. If you peel too early, the adhesive hasn't fully cooled and crystallized, so it can stretch or tear. If you peel too late, the adhesive may have bonded too aggressively to the film, making it hard to release. The sweet spot depends on the film type, the fabric, and the press settings.
Beyond timing, the peel affects the final texture. A clean peel leaves a smooth, flexible print that stretches with the garment. A sloppy peel can create micro-tears, uneven edges, or a cloudy appearance. And let's not forget durability: improper peeling is a leading cause of prints cracking or fading after washing.
Hot Peel vs Cold Peel: What's the Difference?
Most dtf films are designed for either a hot peel or a cold peel. The manufacturer's instructions are your starting point, but here's the breakdown.
Hot Peel
With a hot peel, you remove the film immediately after pressing while the transfer is still hot. The adhesive is soft and pliable, so it releases quickly from the film and grabs the fabric. Hot peel is faster and often preferred for high-volume production because you can move on to the next shirt without waiting. However, it requires a confident, steady motion. If you hesitate, the adhesive can string or stretch.
Cold Peel
A cold peel means waiting until the transfer cools down, usually 30 seconds to a minute, before removing the film. During cooling, the adhesive solidifies and bonds more securely to the fabric. Cold peel is more forgiving for beginners and works well with intricate designs or fabrics that are sensitive to heat. The trade-off is time, but the result is often a softer hand feel and sharper edges.
Some films are marketed as "warm peel," which is a middle ground: wait just a few seconds until the film is comfortable to touch. Always test a new roll of film on a scrap shirt to confirm the recommended peel method.
How to Execute a Perfect Peel
Regardless of hot or cold, the technique is similar. Follow these steps for consistent results.
- Press and remove the garment from the press. Place it on a heat-resistant surface. If doing a hot peel, work quickly but deliberately.
- Anchor the garment. Use one hand to hold the shirt down firmly near the transfer. This prevents the fabric from lifting with the film.
- Peel from a corner. Lift one corner of the film and peel back in a smooth, continuous motion. Avoid yanking or pulling upward at a steep angle; instead, peel back at about 45 degrees.
- Use a peel tool if needed. A silicone peel tool or even a credit card can help you get under the film without touching the hot surface.
- Inspect the print. Check for any areas where the adhesive didn't release. If you see dull spots, the print may have missed the fabric. You can often re-press with the film for a few seconds to fix it.
For cold peel, let the garment cool naturally. Don't rush it with a fan or by placing it in front of an AC, as uneven cooling can cause the film to buckle.
Choosing the Right Peel for Your Fabric
Fabric type influences peel choice. Here's a quick guide:
- 100% cotton: Generally works well with either hot or cold peel. Cold peel may yield a softer finish.
- Polyester and blends: Cold peel is often safer to prevent dye migration and to avoid distorting the fabric. Hot peel can sometimes cause the polyester to become glossy or shrink.
- Delicate fabrics (e.g., rayon, silk): Always use cold peel and lower temperatures to avoid scorching.
- Thick fabrics (e.g., hoodies, canvas): Hot peel can help the adhesive penetrate deeper, but ensure even pressure.
When in doubt, test on a scrap piece of the same fabric.
Troubleshooting Peel Problems
Even with experience, things go wrong. Here are common peel issues and how to fix them.
The print sticks to the film
If part of the design remains on the film after peeling, the adhesive didn't bond to the fabric. Causes include insufficient pressure, low temperature, or peeling too soon (for cold peel). Try increasing pressure or temperature slightly, and ensure you wait the full cooling time. Also, check that the fabric is free of wrinkles and moisture.
The print stretches or distorts during peel
This happens when peeling too fast or at an angle. Slow down and peel back steadily. If the design is large, peel from two corners simultaneously.
Edges lift after peeling
Edges that curl up indicate insufficient adhesion. Re-press the edges with a Teflon sheet or parchment paper for a few seconds. For cold peel, ensure the garment is completely cool before peeling; peeling while warm can cause edges to lift.
Film tears during peel
Hot peel films can become brittle if overheated. Check your press temperature with an infrared thermometer. Also, make sure the film isn't old or stored in a humid environment.
Tools and Accessories for Better Peels
While your hands are the primary tool, a few accessories can make peeling more consistent:
- Silicone peel tool: Helps lift the corner without burning fingers.
- Heat-resistant gloves: For hot peel, protect your hands while maintaining dexterity.
- Teflon sheet: Useful for re-pressing edges or fixing minor lift.
- Infrared thermometer: Verify press platen temperature, as dials can be inaccurate.
These small investments pay off in reduced errors and faster workflow.
Peel and Wash Durability: What to Expect
A proper peel contributes to wash durability. When the adhesive bonds correctly, the print withstands repeated washing. However, even a perfect peel can't compensate for poor-quality film or incorrect curing. Always follow the film's instructions for powder application and curing. After peeling, wait at least 24 hours before washing to allow the adhesive to fully set. Turn garments inside out and wash in cold water to extend print life.
If you notice cracking after washing, it's often due to insufficient pressure during pressing or peeling too early. Revisit your press settings and peel timing.
Frequently Asked Questions About DTF Peeling
Can I re-press a DTF transfer after peeling if I see issues?
Yes, you can often re-press with the film still in place or by placing the film back over the print. Use a Teflon sheet and press for 5-10 seconds at the same temperature. This can fix minor adhesion problems.
How do I know if my film is hot peel or cold peel?
Check the roll's packaging or the manufacturer's website. If unknown, test a small piece: press according to standard settings, then try peeling a corner while hot. If it releases cleanly, it's likely hot peel. If it resists, wait for it to cool and try again.
Why does my print look glossy after a hot peel?
Hot peel can sometimes leave a slightly glossier finish because the adhesive cools rapidly. For a matte look, try cold peel or use a matte film. Also, ensure you're not over-pressing, which can increase gloss.
Is it normal for the film to make a crackling sound during peel?
Yes, especially with cold peel as the adhesive releases. It's not a sign of failure. However, if the film shatters or tears, the temperature may be too low or the film may be expired.
Can I use a heat gun to speed up cooling for cold peel?
Not recommended. Uneven cooling can cause the film to warp and affect adhesion. Let it cool naturally on a flat surface.
Mastering the peel is a small but critical step in the DTF process. With practice and attention to detail, you'll achieve consistent, professional results that keep customers coming back. And if you're looking for high-quality dtf transfers near me, remember that reliable suppliers provide films with clear instructions, so you can focus on perfecting your technique.