
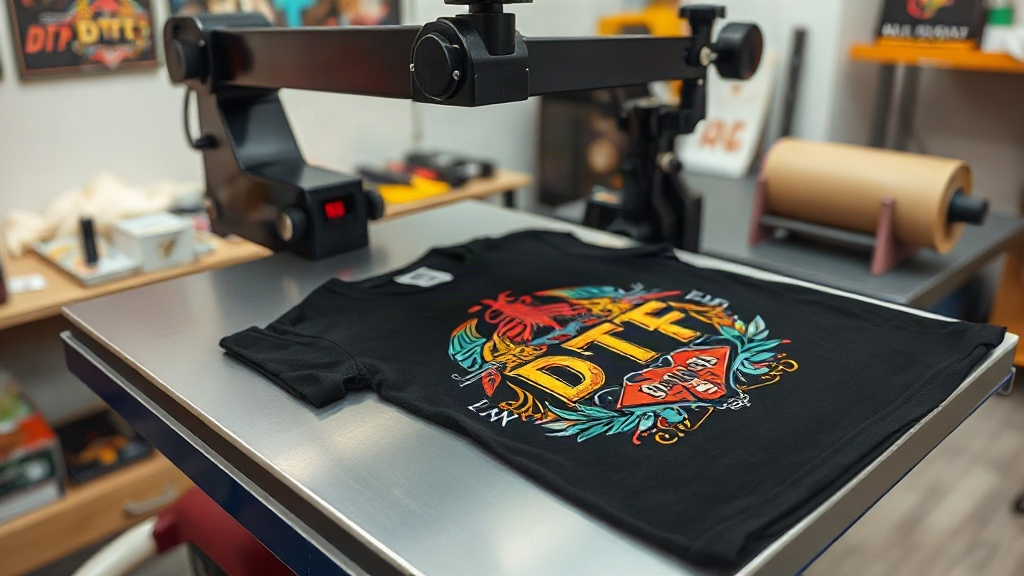
If you've been exploring custom apparel printing, you've likely encountered DTF Transfers. This innovative technology is rapidly becoming the go-to method for creators and businesses alike, offering vibrant colors, exceptional durability, and unmatched versatility. Whether you're a DIY enthusiast or a professional printer, understanding DTF transfers can elevate your game and open up new creative possibilities.
What Are DTF Transfers?
DTF stands for Direct-to-Film. Unlike traditional methods that print directly onto fabric, DTF transfers involve printing your design onto a special film, applying a powder adhesive, and then transferring it onto the garment using a heat press. This two-step process allows for intricate details and a soft feel that rivals screen printing and DTG (Direct-to-Garment).
The DTF Printing Process Explained
Here's a breakdown of how DTF transfers are created and applied:
- Design Preparation: Your artwork is prepared digitally, ensuring it's mirrored if necessary and sized appropriately.
- Printing: A DTF printer uses specialized inks (CMYK plus white) to print the design onto a PET film. The white ink acts as a base, allowing the design to show up on dark fabrics.
- Powdering: While the ink is still wet, a hot-melt adhesive powder is applied evenly over the design. Excess powder is shaken off.
- Curing: The film passes through a curing oven or heat press to melt the powder, creating a dry, tacky surface.
- Transfer: The film is placed on the garment and pressed with a heat press at a specific temperature and pressure for a set time.
- Peeling: After pressing, the film is peeled away (hot or cold peel depending on the film), leaving the design bonded to the fabric.
Each step requires precision, but the results are worth it. The adhesive powder ensures the design stretches with the fabric without cracking, making it ideal for activewear and stretchy materials.
Why Choose DTF Transfers Over Other Methods?
With so many printing options available, you might wonder why DTF stands out. Here are some compelling reasons:
- Versatility: DTF transfers work on a wide range of fabrics, including cotton, polyester, blends, and even leather. No need for pre-treatment like DTG.
- Vibrant Colors: The white ink base allows for bright, opaque colors on both light and dark garments.
- Durability: When applied correctly, DTF prints withstand repeated washing without fading, cracking, or peeling.
- Detail Retention: Fine lines, small text, and gradients are reproduced with impressive accuracy.
- Cost-Effective for Short Runs: Unlike screen printing, which requires setup costs per color, DTF is economical for small batches and one-offs.
These advantages make DTF transfers a favorite among small business owners, crafters, and anyone looking to create professional-grade custom apparel.
Designing for DTF Transfers: Best Practices
To get the best results from your DTF transfers, keep these design tips in mind:
- Use High-Resolution Images: Since DTF can capture fine details, start with at least 300 DPI to avoid pixelation.
- Consider Fabric Color: While DTF works on any color, designs with white elements may require a white underbase (which is automatically included in the print).
- Avoid Very Thin Lines: Extremely thin lines might not hold up as well; a minimum line width of 1-2 points is safer.
- Test with a Small Batch: Before committing to a large order, print a sample to check color accuracy and adhesion.
- Mirror Your Design: Remember that the design must be mirrored before printing onto the film, as it will be flipped during transfer.
By following these guidelines, you'll ensure your DTF transfers look sharp and last long.
Step-by-Step: Applying DTF Transfers at Home
You don't need a commercial shop to apply DTF transfers. With a heat press and a few supplies, you can do it at home. Here's how:
- Preheat Your Heat Press: Set the temperature to around 325°F (160°C) for most fabrics.
- Position the Transfer: Place the DTF film onto the garment with the design facing up. Use heat-resistant tape if needed to prevent shifting.
- Press: Apply medium to firm pressure for 10-15 seconds.
- Peel: Wait a few seconds for the transfer to cool slightly, then peel the film off in a smooth, consistent motion. Some films require hot peel; check your film's instructions.
- Post-Press (Optional): For extra durability, cover the design with parchment paper and press again for 5-10 seconds.
Practice on a scrap piece of fabric first to dial in your heat press settings. Every press varies, so a test run can save you from ruining a good garment.
Common Mistakes to Avoid with DTF Transfers
Even seasoned crafters can run into issues. Watch out for these pitfalls:
- Insufficient Pressure: Too little pressure prevents the adhesive from fully bonding, leading to early peeling.
- Wrong Temperature: Too hot can scorch the fabric or melt the film; too cold means poor adhesion.
- Peeling Too Soon or Too Late: Follow the film's peel instructions precisely. Hot peel films should be removed immediately, while cold peel films need to cool completely.
- Not Pre-Pressing the Garment: Pre-pressing removes moisture and wrinkles, ensuring a smooth application.
- Using the Wrong Powder: Always use the adhesive powder recommended for your DTF film; substitutes may not bond properly.
Avoiding these mistakes will save you time, money, and frustration.
DTF Transfers vs. Other Printing Methods
How does DTF stack up against DTG, screen printing, and vinyl? Here's a quick comparison:
- DTG: Great for cotton, but requires pre-treatment and can be less vibrant on dark colors. DTF offers better color vibrancy and works on more fabrics.
- Screen Printing: Cost-effective for large orders but expensive for small runs and limited in color gradients. DTF excels in small batches and complex designs.
- Vinyl: Ideal for simple shapes and text but not for detailed images. DTF handles full-color graphics with ease.
Each method has its place, but DTF's flexibility makes it a strong contender for a wide range of projects.
Frequently Asked Questions About DTF Transfers
How long do DTF transfers last?
With proper application and care, DTF transfers can last as long as the garment itself. They withstand 50+ washes without significant fading or cracking when washed inside out in cold water and tumble dried on low.
Can I use DTF transfers on polyester?
Absolutely! DTF transfers work beautifully on polyester, cotton, blends, and even treated leather. The key is to adjust heat press settings for the fabric type to avoid scorching.
Do I need a special printer for DTF transfers?
Yes, you need a DTF printer that uses DTF inks and a powder shaker. However, you can also purchase pre-printed DTF transfers from suppliers and apply them with a standard heat press.
What is the best heat press temperature for DTF?
Most DTF films recommend 300-325°F (150-160°C) for 10-15 seconds with medium-firm pressure. Always check your film's specific instructions, as formulations can vary.
Can I layer DTF transfers?
Yes, you can layer DTF transfers, but it's best to press each layer separately. Use a lower temperature for subsequent presses to avoid disturbing the previous layer.
DTF transfers are a game-changer in the custom apparel industry. With their versatility, durability, and stunning results, they empower anyone to create professional-quality garments. Whether you're starting a clothing brand or making personalized gifts, mastering DTF transfers will set you apart. So gather your designs, fire up your heat press, and let your creativity shine.